中文官方wiki
https://oldwiki.archive.openwrt.org/zh-cn/start
系列型文章:https://blog.csdn.net/weixin_38387929/article/details/111385829
目录
一、直接可下载镜像
阿里云镜像:
https://developer.aliyun.com/mirror/openwrt
官方下载地址:
https://archive.openwrt.org/
镜像说明:
https://blog.csdn.net/lzyaks/article/details/128758020
二、编译
https://www.cnblogs.com/kn-zheng/p/17340776.html
https://www.cnblogs.com/sammei/p/3968916.html (编译原理)
https://www.jianshu.com/p/b644efe12612
1.修改镜像源
-
修改镜像源:https://blog.csdn.net/yao1500/article/details/105948229/
否则下面的更新会非常慢./scripts/feeds update -a ./scripts/feeds install -a make download -
提升依赖文件的下载速度
https://blog.csdn.net/u010307522/article/details/107139733/
找到 scripts/download.pl 文件,修改 https://sources.cdn.openwrt.org 地址 https://sources.openwrt.org/ -
手动下载替换
上面的镜像源码替换完以后,仍有部分库(如github.com上的库)会下载失败,需要通过一些加速链接下载之后手动替换。
https://downloads.sourceforge.net/linux-atm/linux-atm-2.5.2.tar.gz
2.完整编译流程
https://github.com/coolsnowwolf/lede
https://mp.weixin.qq.com/s?__biz=Mzk0MDQzNjE3Nw==&mid=2247484987&idx=1&sn=4d204313a1023df0193469aa4fda041b&chksm=c3e2b6bf080fc29953c5345c8dde63e0b90eb894f3209570915bbf2c968e6bf5a40070d431c1&mpshare=1&scene=24&srcid=12253nHMstf3UvioJ8ggCv0l&sharer_shareinfo=01e7f047d2938312b589b486440d11f7&sharer_shareinfo_first=01e7f047d2938312b589b486440d11f7#rd
https://blog.csdn.net/m0_52842889/article/details/119782763
https://blog.csdn.net/lawsssscat/article/details/107305357 (**)
1)完整编译流程
1)下载源码
https://github.com/coolsnowwolf/lede (lede版本)
2)更新源
sudo apt update -y
sudo apt full-upgrade -y
3)安装依赖
sudo apt install -y ack antlr3 asciidoc autoconf automake autopoint binutils bison build-essential \
bzip2 ccache cmake cpio curl device-tree-compiler fastjar flex gawk gettext gcc-multilib g++-multilib \
git gperf haveged help2man intltool libc6-dev-i386 libelf-dev libfuse-dev libglib2.0-dev libgmp3-dev \
libltdl-dev libmpc-dev libmpfr-dev libncurses5-dev libncursesw5-dev libpython3-dev libreadline-dev \
libssl-dev libtool lrzsz mkisofs msmtp ninja-build p7zip p7zip-full patch pkgconf python2.7 python3 \
python3-pyelftools python3-setuptools qemu-utils rsync scons squashfs-tools subversion swig texinfo \
uglifyjs upx-ucl unzip vim wget xmlto xxd zlib1g-dev
4)更新/下载插件
./scripts/feeds update -a
./scripts/feeds install -a
5)配置编译选项
make menuconfig
a.板型
b.其它
6)下载dl库
make download -j8
7)编译
make V=s -j1,首次建议单核编译。
2)注意事项:
1)不能用root用户编译
项目文件夹包括一切子文件的权限必须和当前用户一致,否则会出现各种莫明的错误。
2)dl文件夹很多依赖库都是从github.com上下载的,会失败。
dl库可以提前下好(但是程序里会检验文件hash值)
git clone https://e.coding.net/yao7778899/openwrt-dependent-dl.git dl
最好是开启代理,但是开启代理可能也有部分库会下载失败,需要手动下载替换。
3.编译中的坑
-
找不到头文件pcre2.h
在源码配置里开启库的依赖https://blog.csdn.net/caofengtao1314/article/details/83140841
make menuconfig -
lucihttp库无法下载
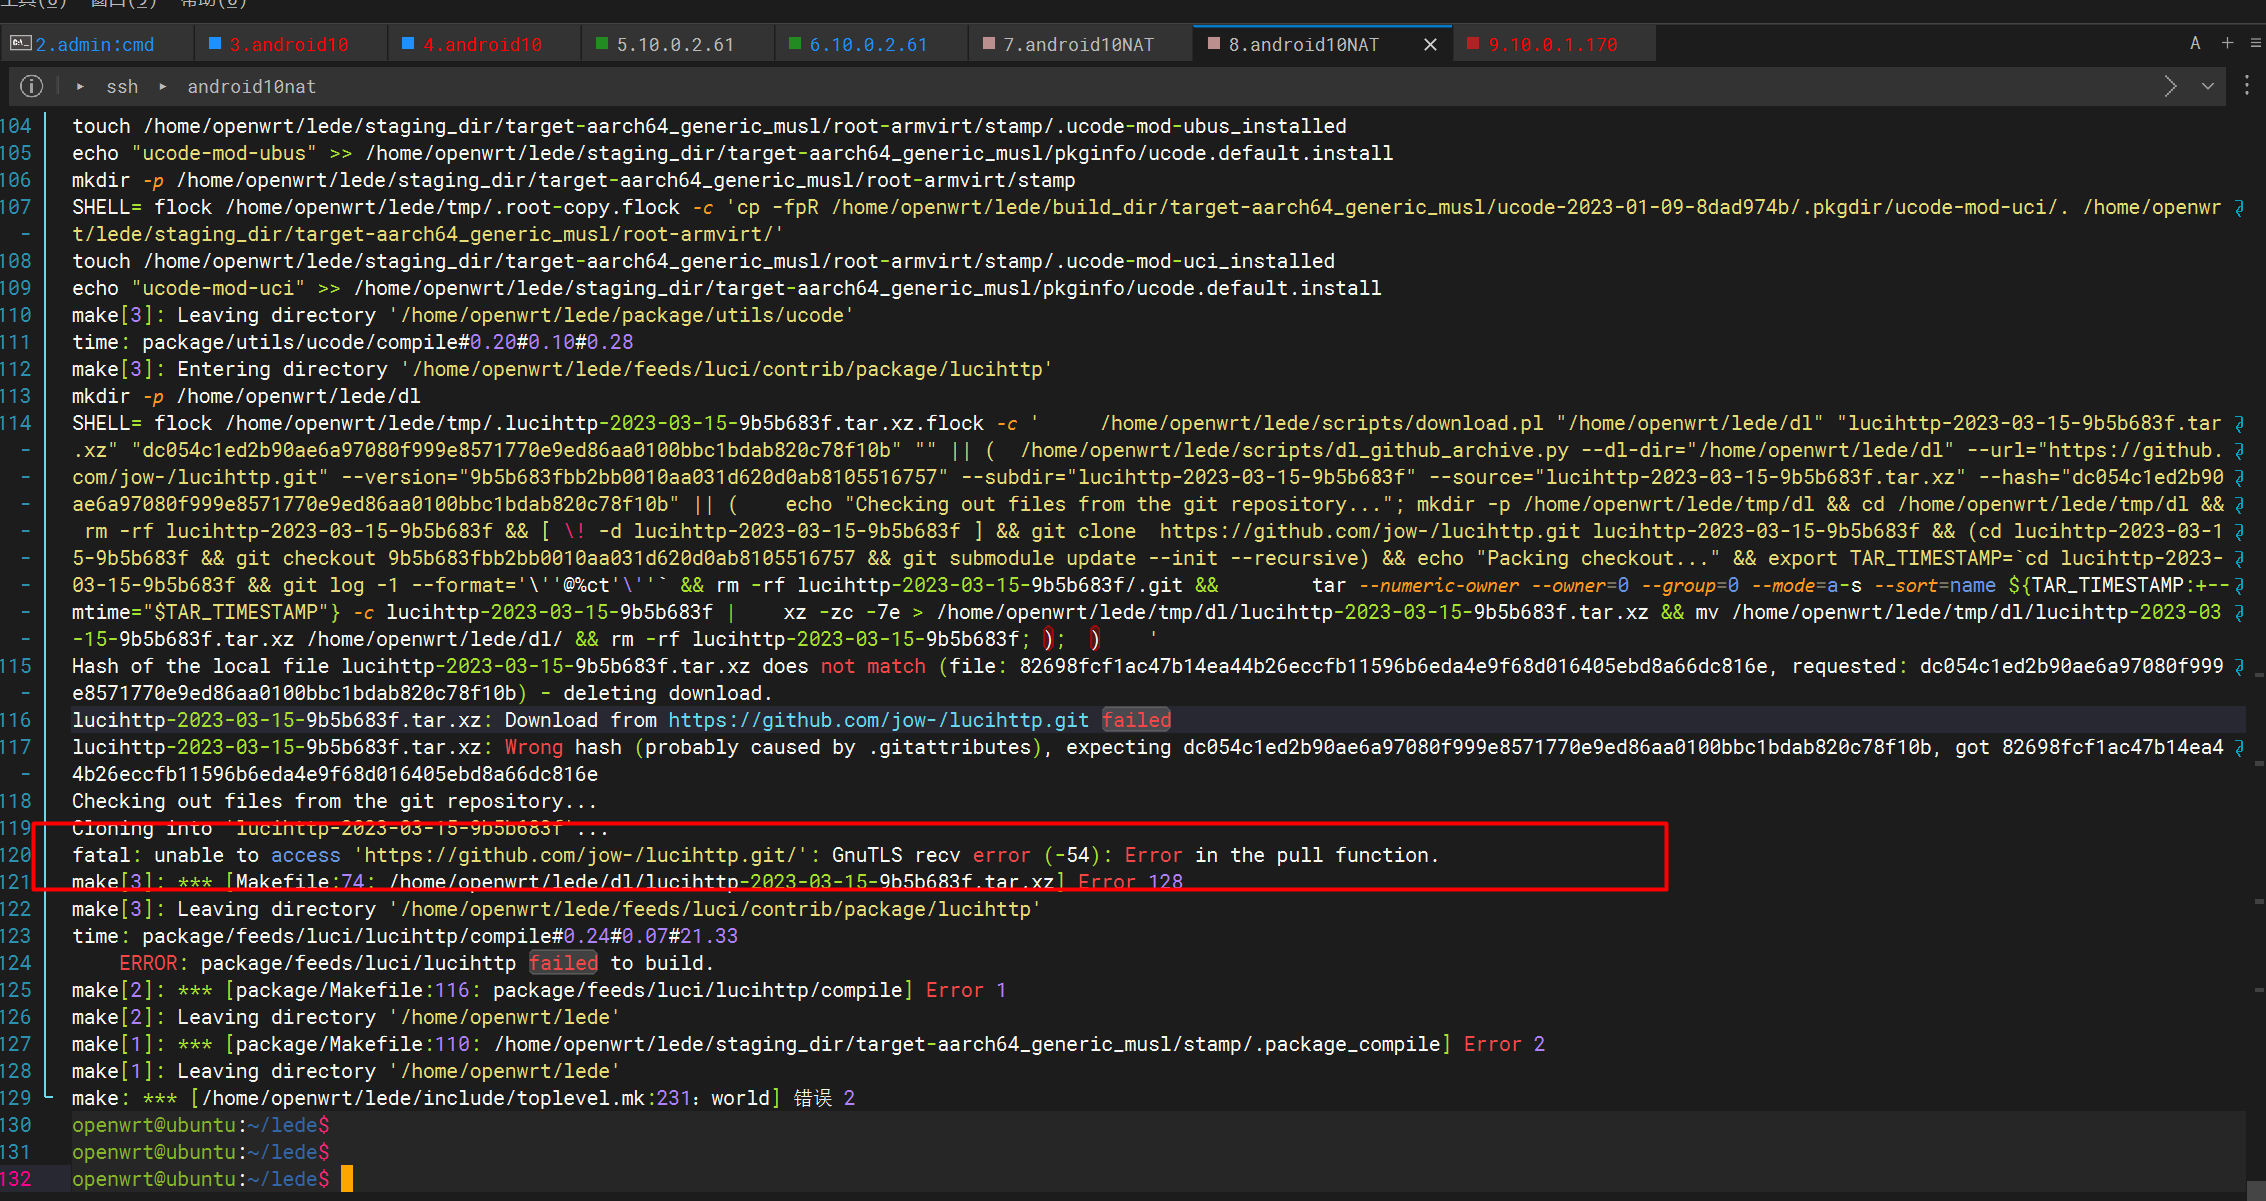
开了代理在虚拟机里普通用户git clone是不能正常下载的,但是编译时不行。
尝试手动下载luttp包或者直接clone,按照上面的shell命令生成包也会产生错误。
最终不得不修改源码vim scripts/download.pl +342,尝试在处理lucihttp库时不作hash校验:
编译可在Qemu虚拟机上运行的镜像
https://blog.csdn.net/zjy900507/article/details/88660270
make menuconfig注意选择对应架构

三、qemu启动openwrt
在终端里执行qemu-system-x86_64 -drive file=openwrt.raw,format=raw命令报错gtk initialization failed
https://blog.csdn.net/o_alpha/article/details/132668657
启动命令要增加-nographic参数
qemu-system-x86_64 -drive file=openwrt.raw,format=raw -nographic
关于-nographic参数:
1)无界面启动
2)不同的openwrt版本,有的通过nohup qemu openwrt &后台启动openwrt 需要加-nographic参数,有的不需要加。
调试openwrt,突然无法启动。
大致是执行下面的脚本,后来突然openwrt就无法启动了。
# 设置QEMU参数
QEMU_IMG="qemu-img"
DISK_SIZE="2G"
BOARD="x86_64"
MEMORY="1024M"
QEMU_BIN="qemu-system-${BOARD}"
QEMU_ARCH="x86_64"
QEMU_KERNEL="vmlinuz"
QEMU_INITRD="initramfs"
QEMU_SD="openwrt.raw"
QEMU_SNAPSHOT="openwrt-snapshot"

# 创建磁盘镜像
${QEMU_IMG} create -f raw ${QEMU_SD} ${DISK_SIZE}

# 启动QEMU
#${QEMU_BIN} -machine type=q35 -m ${MEMORY} -drive file=${QEMU_SD},format=raw,id=hd0 -device virtio-blk-pci,drive=hd0 -netdev user,id=net0 -device e1000,netdev=net0 -boot order=c -kernel ${QEMU_KERNEL} -initrd ${QEMU_INITRD} --nographic
无法启动:

正常启动:

后来测试vmdk文件可以正常启动,那说明.raw文件可能是损坏了。
qemu-system-x86_64 -m 256M -drive file=openwrt.vmdk -net nic -net user --nographic
四、openwrt更新镜像源
https://mirrors.tuna.tsinghua.edu.cn/help/openwrt/
编辑/etc/opkg/distfeeds.conf ,然后opkg update 更新镜像源。
注意只要替换前面的url即可,后面的架构不要动。
五、语言汉化
1)安装中文包:opkg install luci-i18n-base-zh-cn
2)设置并应用
System -> System -> Language and Style -> Language,选择 简体中文 (Chinese Simplified),然后点击 Save & Apply 保存。
六、vmware启动openwrt
https://blog.csdn.net/qq_38721267/article/details/129296766
注意openwrt.img转openwrt.vmdk,如果vmwate提示不是虚拟磁盘,则转换应在windows平台上安装qemu-utils再利用qemu-img工具进行。
0 条评论